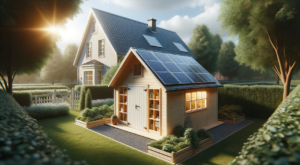
One year after installing my first DIY home solar system, I wanted to upgrade it and expand. Like most recent owners of home solar, I wanted more. I evaluated the options at my property. A solar pergola or a flat-roof gazebo were the finalists. Ultimately, I built a flat-roof wooden gazebo with enough panels to double my solar capacity nearly. It was a fantastic asset to my garden and solar energy system. In this article, I’ll walk you through the process.
Why Build A Gazebo?
It was the best option for expanding the existing solar energy system I had at the time. I had a few specific requirements and some constraints:
- Have enough space to host around 8 panels
- Near to the existing solar system – I wanted to connect the new array to my Sunsync 3.6 ECCO inverter without running long lines of DC cable.
- Cost-effective – initially, I was planning a budget of around £1000. More on that further in this article.
- Safety – I wanted to work without the need for specialized equipment such as scaffolding.
- Be sturdy enough to host the panels for the duration of their lifetime; around 20 years.
Added Value in Garden Appeal
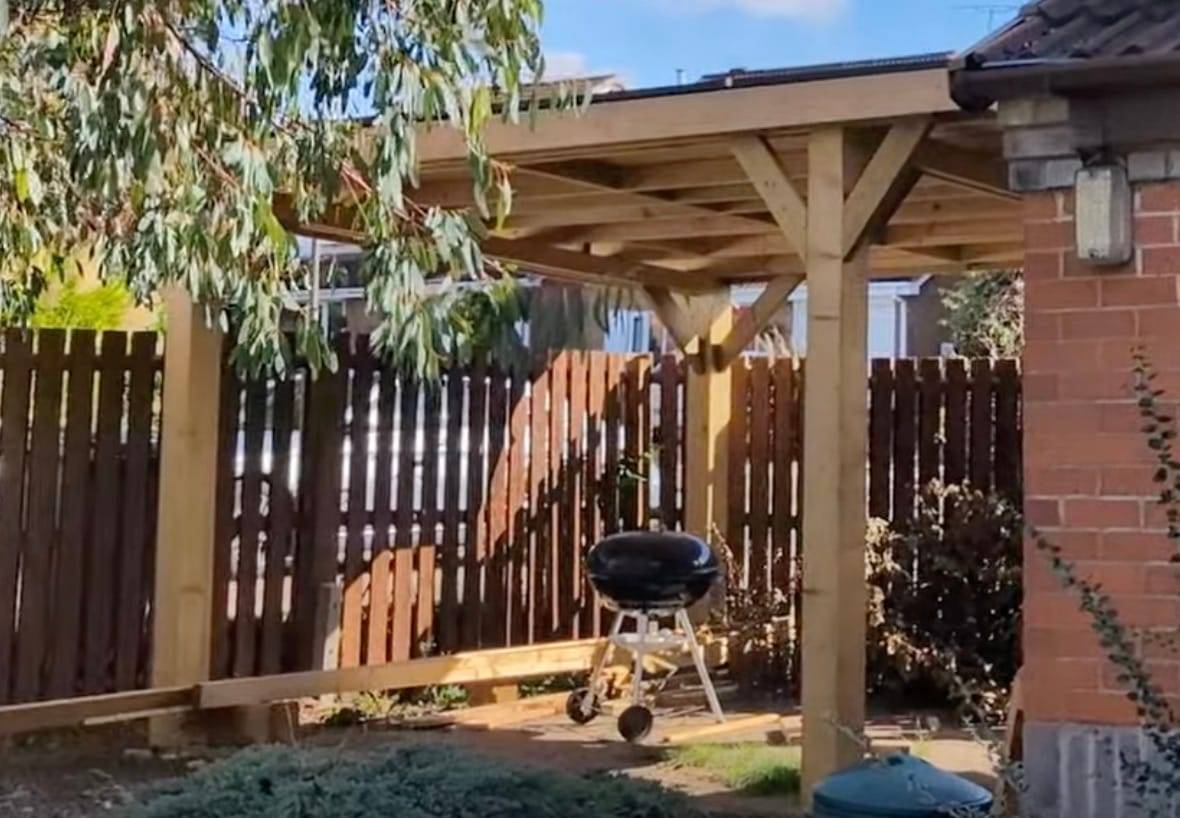
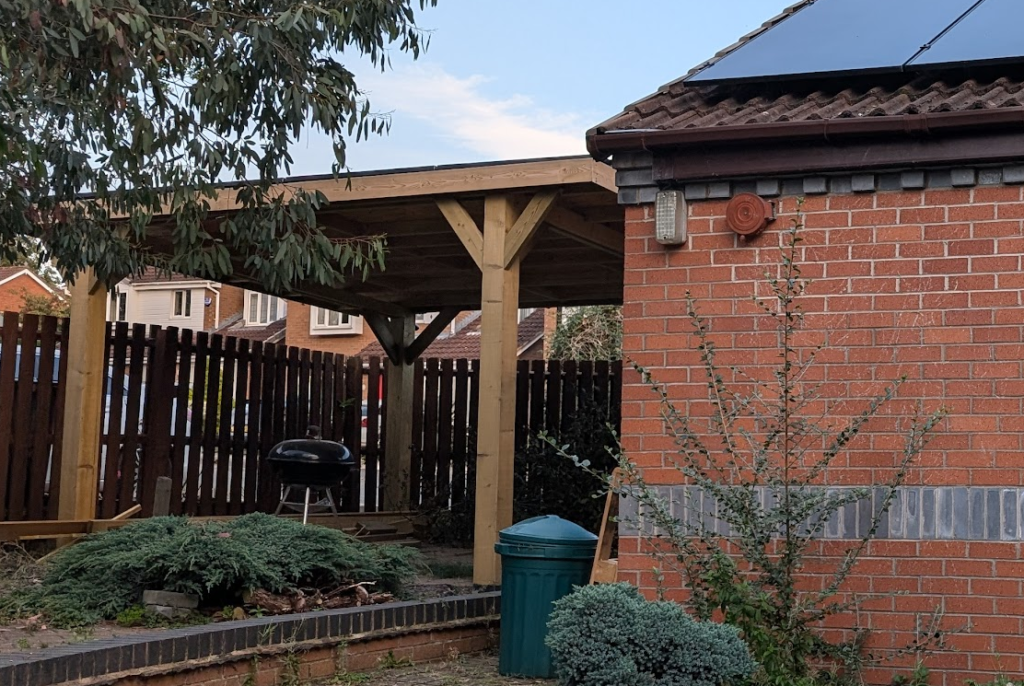
The wooden structure of the gazebo adds nice contrast to to the brick walls and leafy trees around it. The thicker posts I used to support the structure stand out and give the feeling of sturdiness.

Solar Expansion
The main driver here was solar expansion. I wanted to offset the winter months. I had two strings of 5 and 4 panels on a pitched roof garage facing East and West. That system didn’t do as much as I wished it had during the first winter, hence the drive for expansion.
Why Expand the Solar and Not The Battery?
With all the existing setups in my system, the lack of generation was a limiting factor in my energy savings. Another obstacle to battery expansion was the hybrid inverter’s capacity, which was only 3.6kW. In this situation, over-panelling with a gazebo offered the best trade-off for me. That way, I will only lose out on a few hours of optimal conditions in the height of summer.
I will cover the details of the matter in a different article.
Lower Risk
I am a DIY-er, and playing to my strengths, I decided to avoid working on the roof of the house. My house is two stories high with a 30° pitched roof.
Although it could be done DIY, I decided against it. I neither have the scaffold nor the experience to set up one if I rented it. I did not get my DIY skills by backing away from jobs where I needed to learn new skills, but I had no desire to learn how to set up scaffolding correctly. Hence, I quickly moved away from this option.
Other Uses
The gazebo I built has a solid roof and ample space underneath. I have been using it to keep the BBQ underneath. It has served us well in a few rainy spells during barbecuing. I also believe that should I decide to, I can board up the walls and convert it into a shed.
Financial Sense
One of the most appealing reasons for building the gazebo was that the cost of the timber was comparable to the cost of propping up a scaffold. In my case specifically, the house has a small feature roof connecting a bay window to the entrance door, and that would have complicated the scaffolding further.
Furthermore, building a wooden structure in the garden is entirely under my control, and I can take my time with it. In contrast, if I hire a scaffold to work on the house roof, I would be bound to the rental period.
How Much Did It Cost?
The total cost came to £2018. This includes some tools I needed.
| Item | Cost (£) |
|---|---|
| Timber | 320.00 |
| Timber for roofing | 274.00 |
| Timber for bracing and noggins | 90.00 |
| solar panels | 487.00 |
| DC isolator | 28.00 |
| Screws and bolts | 47.00 |
| Post digging tool | 28.00 |
| Postscreed | 40.00 |
| Conduit | 11.00 |
| Felt | 80.00 |
| Roofing glue and nails | 32.00 |
| Cable | 22.00 |
| Saws | 13.00 |
| Inverter | 150.00 |
| Drill bits | 5.00 |
| Saw blades | 25.00 |
| Handsaw | 7.00 |
| AC switch | 11.00 |
| MC4 | 11.00 |
| Stainless steel screws | 32.00 |
| Cable | 55.00 |
| Mitre saw | 250.00 |
| Total | £2018 |
Tools are a long-term investment. I was debating whether they should go on the list. But since I wouldn’t have bought them this year otherwise, they count too. Since building the gazebo, I have used the new tools in other projects to add a silver lining.
Learn From My Experience. Plan And Build Your Gazebo
Planning thoroughly is essential for the success of this project. One of the biggest challenges I faced was realising that I needed to change the design in the middle of the building.
Initially, I was planning a solar pergola, and I thought I would just hang the panels on the cross beams. However, as I built the frame, I decided to make the roof waterproof. The only way I know and am confident I can do this is by using sheets, OSB in my case, and lining them with roof felt. There are other options but I don’t have experience using those.
As a result, I had to order more timber and build more structural elements into the current frame to strengthen it.
Blueprint
Here is a schematic representation of the final structure I built. I mounted the panels on roof rails, which I fastened directly to the beams underneath them. So, if you are using this design, you have to adjust it according to the panels you plan to use.

I used panels LONGi Solar Hi-MO 5m 410WP Full Black PV Module LR5-54HPB-410M, and they are 1134mm x 1722mm.
Permitted Development
In the UK, there are rules and regulations about the size and location of garden structures. If you are not careful, your hard work may cause you headaches with the local authorities and your neighbours.
Gazebos and pergolas generally fall within Permitted Development. This means you don’t have to apply for planning permission to build such structures. However, permitted development comes with rules.
Within 2 meters of a boundary, you are allowed a maximum height of 2.5 meters.

Beyond 2 meters of the boundary, the maximum height goes up to 3 meters. The pavilion should not cover more than 50% of the land around the house and cannot be located in front of the house.
You can find the permitted development rules under Class E in the Permitted development rights for householders: technical guidance.
Tools and Materials
| Item | Quantity | Price (£) |
|---|---|---|
| 150mm x 150mm Rough Sawn Green Treated Fence Post | 4 | 137.96 |
| 18mm OSB 3 Board 2440mm x 1220mm (8’x4′) | 6 | 112.50 |
| 22mm x 100mm Planed Treated Boards (Finish 94mm x 18mm) | 4 | 38.20 |
| 22mm x 150mm Planed Treated Boards (Finish 144mm x 18mm) | 4 | 53.84 |
| 47mm x 100mm Structural Graded C24 Treated Carcassing | 12 | 91.54 |
| 47mm x 125mm Structural Graded C24 Treated Carcassing | 6 | 53.58 |
| Treated Softwood Screening 44mm x 20mm | 5 | 25.00 |
| Subtotal | 512.62 | |
| Shipping | 45.00 | |
| Taxes | 113.80 | |
| Total | 671.42 |
Top Tip:
Buy a sliding mitre saw if you haven’t got one. Buy new discs for your mitre saw and circular saws.
Working with wood is fun. It is almost therapeutic to experience the progress when building wooden structures. Blunt tools are the only thing that gets in the way of all that fun, and I learned that from experience.
Gazebo Solar Performance
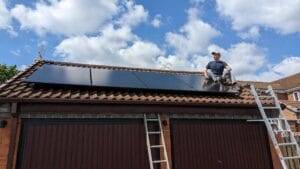
The solar panels on the gazebo are not at the optimal tilt angle for the latitude. To compensate for that, I have added more panels. These panels are facing East, South-East at an angle of 6°.
Luckily right next to the gazebo, I’ve got a garage with a pitched roof at around 30°. There are five panels on that side of the garage, facing the same direction as the gazebo.
| Location | Angle | Panels | PV |
| Garage | 28° | 5×430 | 2150Wp |
| Gazebo | 6° | 8×410 | 3280Wp |
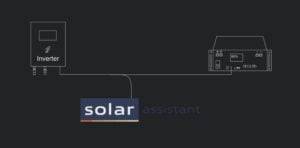
The two strings above are connected to a Sunsync 3.6 ECCO hybrid inverter. Here is how these strings perform.
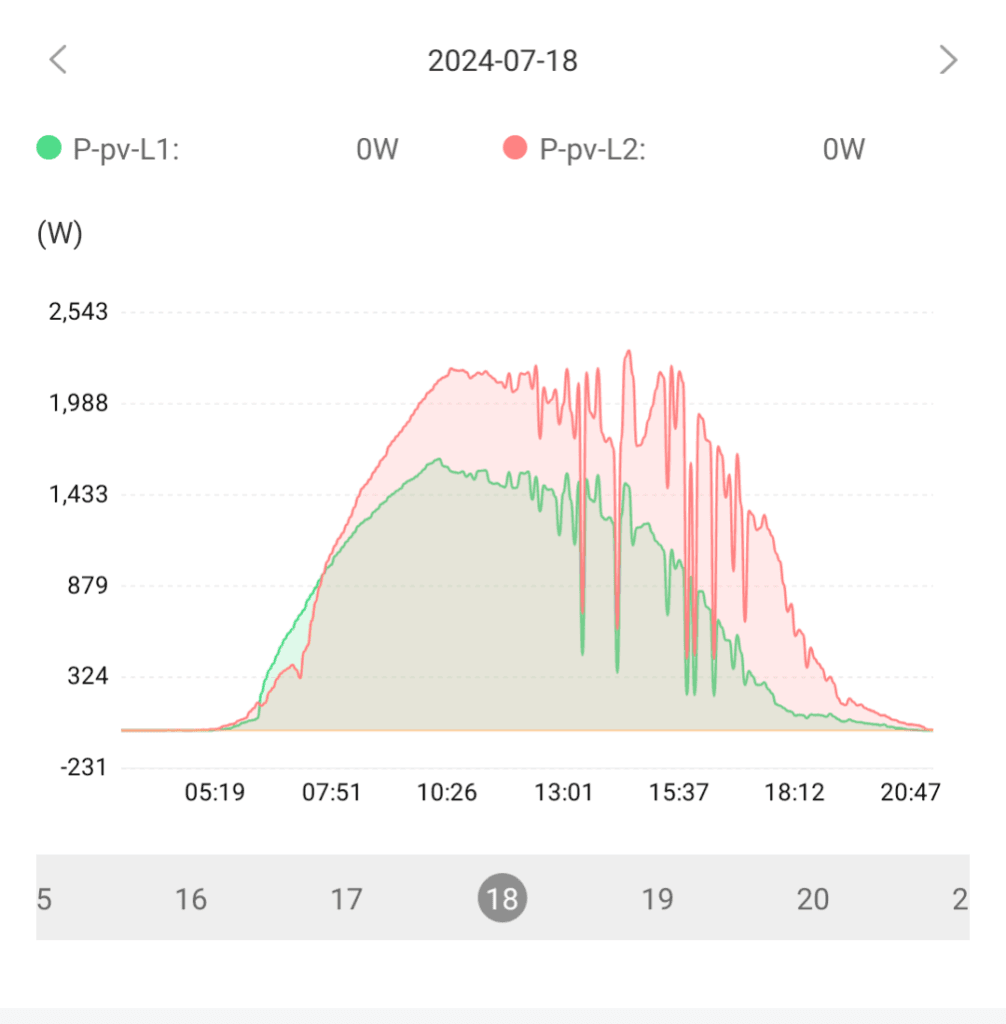
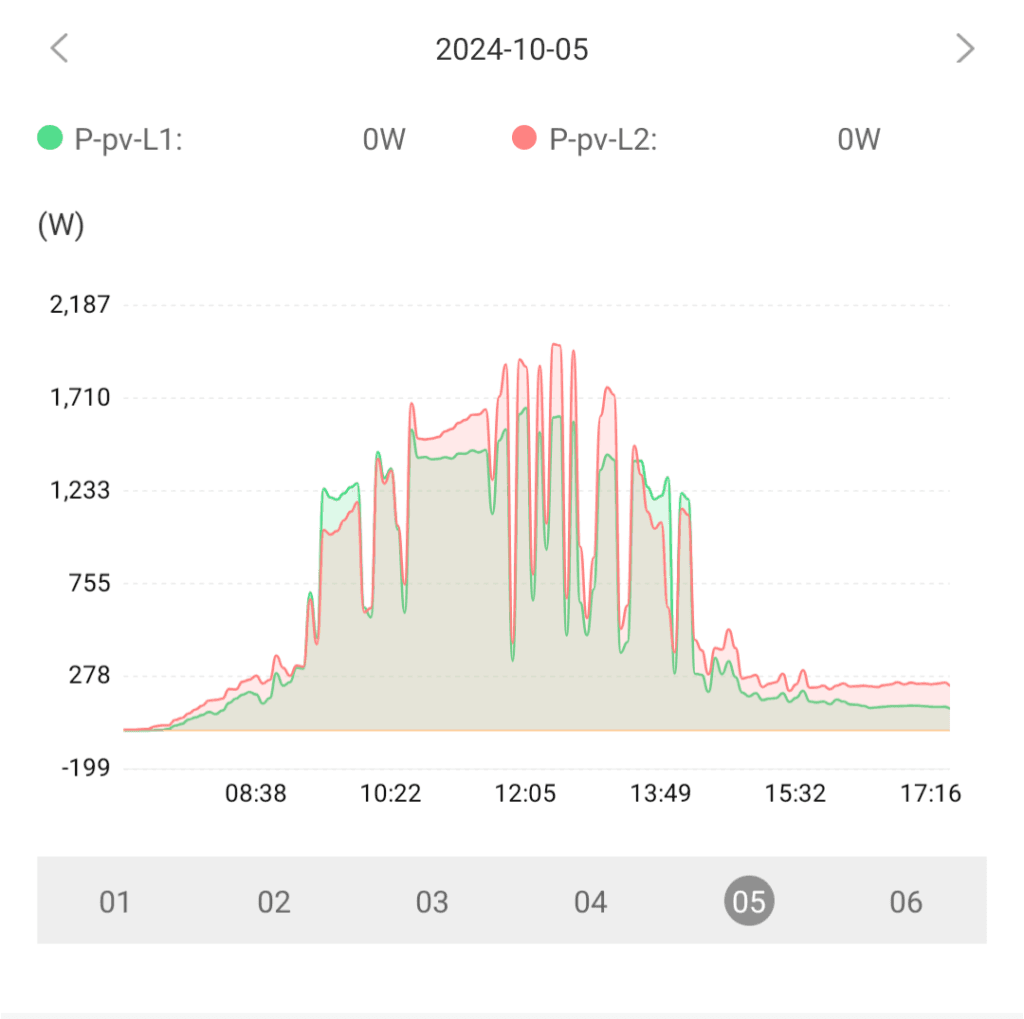
We can see that in both cases, the larger string on the gazebo is outperforming the garage. To me this means that the negative effect is not too strong.
I selected July and October as samples because, in July, the gazebo’s flat roof would be operating at a better angle. In contrast, in October, the garage roof’s steeper angle gives it the upper hand.
What Maintenance Is Required for a Solar Gazebo?
Cleaning the panels. I noticed that the smaller tilt angle causes water to sit longer on the panels’ lower parts. This is because the panel frame sticks out above the panel’s surface and dams the water. Thus, the residue of rainwater and dust cannot drain efficiently and dries up on the panels.