Solar Panel Installation on Tiled Roofs: Best Practices for Mounting Roof Rails, Hooks, Connecting Panels To Rails and Safety

Installing solar panels on roofs is a popular choice for several reasons: low chances of shade from nearby objects, ample space that serves no other purpose, and closeness to your home.
How are solar panels fixed to a tiled roof?
Solar panels are mounted on a system of rails and roof hooks. The rails float above the roof tiles. This floating effect is essential, as touching the tiles risks damage from heavy snow or severe wind, which can cause the solar panels to rattle and shake.
Additionally, the air circulation underneath the panels helps cool them off. This is important as high temperatures are a significant efficiency drag on solar panels.
Roof Hooks
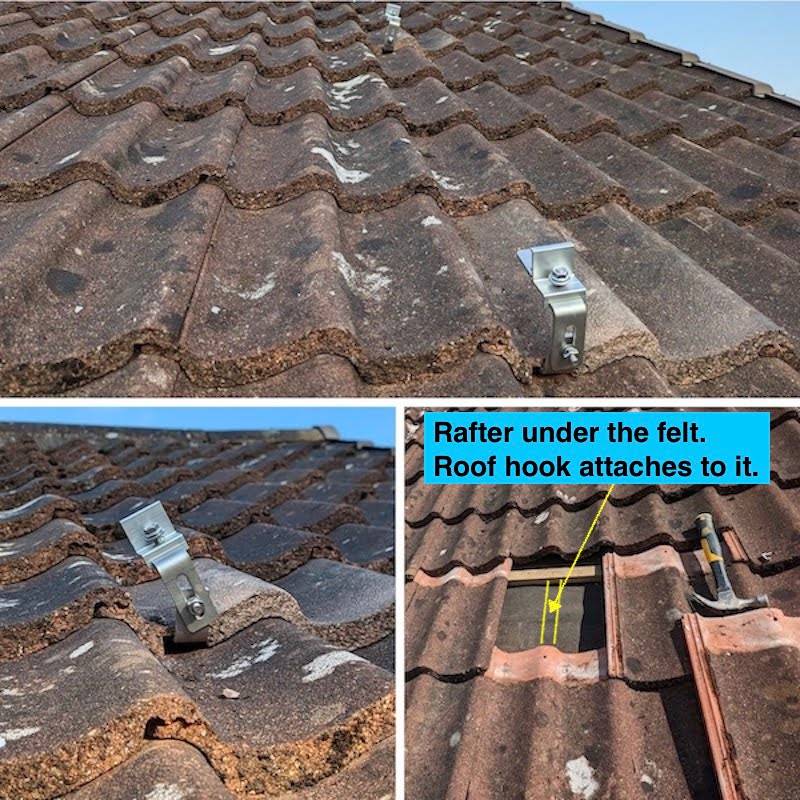
The rails are held to the roof by roof hooks. They are sturdy metal brackets screwed into the joists underneath the tiles and sit between two tiles where rows of tiles overlap.
You can see a diagram of a roof hook above. Some roof hooks come with extra adjustments built-in. These allow you to control the protruding elements’ depth and the angle at which the hook meets the rails. Such adjustments come in handy as on roofs, you’re working with wide distances, and you have limited available points for installing the hooks. This means that a slight shift in one hook’s position is emphasised over the distance.
Installation Requirements
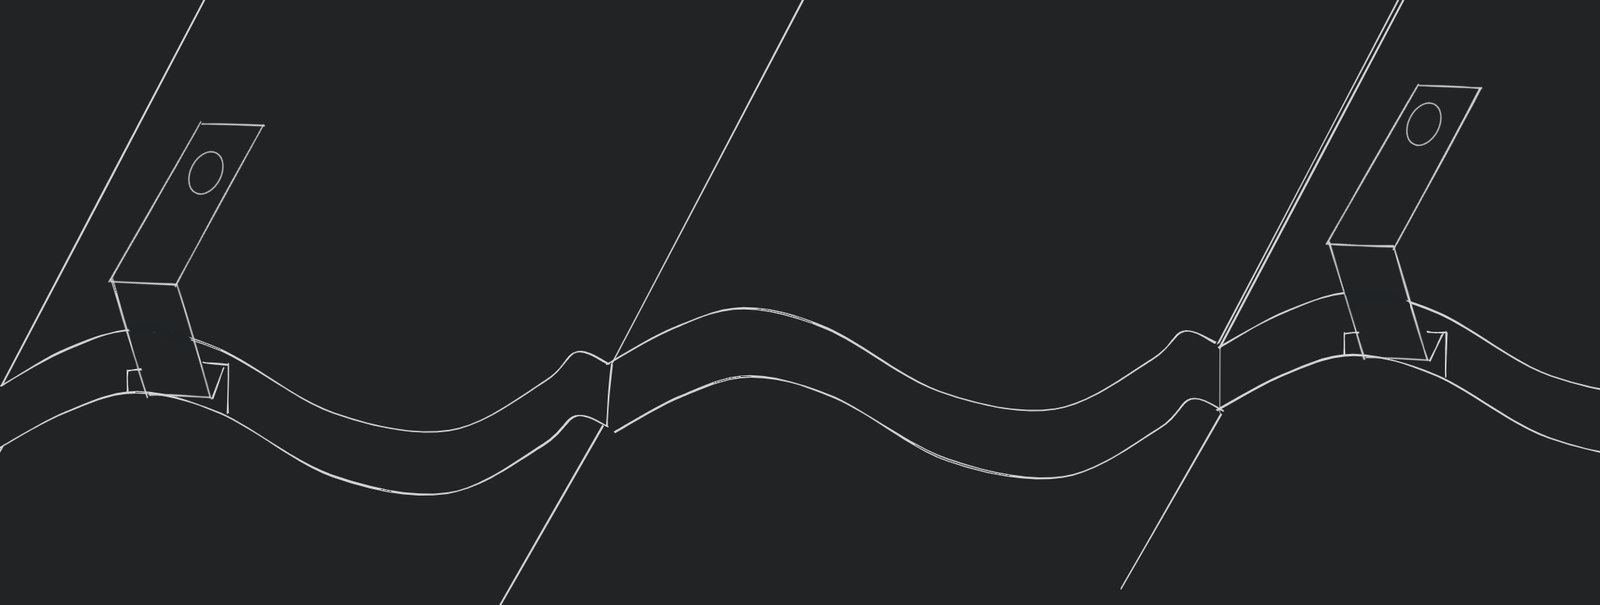
The roof hook should not alter how well one row of tiles lays over the next. To achieve this, you must cut a channel for the roof hook to sit in at the bottom of the upper tile. As you can see in the diagram above, the tiles are flush, and the upper tiles are grooved to make room for the roof hook.
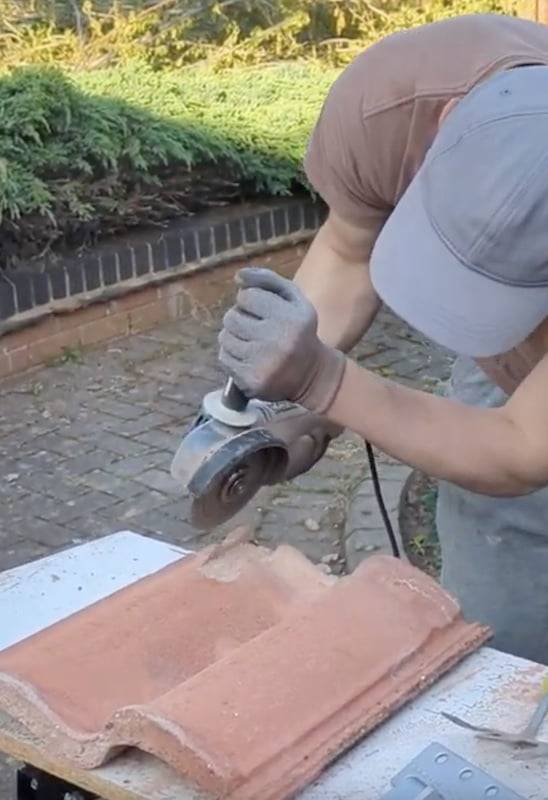
How does the rail connect to the roof tiles and solar panels?
Multiple ways exist to achieve this; every manufacturer has chosen a slight variation. Usually, there is a clipping mechanism that is fastened with bolts. Bolts on solar mounting equipment come with nice utilities for single-tool fastening and do not require special spanners; a hex Allen key or a spanner is likely all you need.

Clipping the Solar Panels to the Roof Rails
Solar panels are clipped to the rails with a different clip. There are fewer variations here; ultimately, they all have some part that goes into the rail and another that sits on top of one or two panels. The two parts are fastened with a bolt. Again, no special tools are required.
Safety and Practical Advice for Installing Solar Panels on a Roof
The roof is one of the most crucial parts of a building. Take extra care to not damage or compromise your roof while adding solar panels. On top of that, working on roofs is one of the more dangerous jobs you may find yourself doing, so extra care and knowledge will help you stay safe. I will provide some safety advice and points to consider before installing solar panels on your roof.
Assess the Structural Health of the Roof
Solar panels add extra weight to your roof structure. Inspect your roof for visual sagging, cracked or missing tiles or other signs of leaks. It is important that your roof is sound and stable before commencing the installation.
A roof built with conventional materials can safely carry additional weight, but if you are not sure if it will handle your system, it’s best to consult a structural engineer. They will evaluate the roof’s integrity, considering factors like the age of the building, the condition of the timber, and the existing load from tiles.
Roof Hooks are Screwed to the Rafters
Ensure you find the rafters underneath your tiles and screw the roof hooks to them. Watch this video for greater detail. Rafters are the weight-bearing elements of your roof, and they are the right place for the roof hooks.
To protect your rafters from water, you can use some roof sealant between the roof hooks and the roof membrane. I used plenty to make sure the screw holes are well sealed.
Walking on Tiles
To avoid breaking tiles during installation, walk only on the lower third of each tile. This is where a tile overlaps with the one below, which is the strongest part.
Prepare for Breakage
Tiles are generally sturdy and there is a chance everything will go without issues. If a tile does break, have a contingency plan including having spare tiles and the appropriate tools on hand to replace them immediately. As a final resort you can place some plastic sheet over the broken tile and repair it when you get the materials.
Use the Roof Rails You Installed
Install the lowest rail first and use it for walking or holding on to it. It is surprisingly useful to have such aid on a roof. To prevent cracks in the weakened tiles, you can place a board that spas across multiple roof hooks and distributes your weight when stepping near them.
Running Cables
Avoid water collection points or snug fits with abrasive items such as tiles when running cables. When grinding channels in the tiles for roof hooks, consider adding an extra channel for where a cable may run.
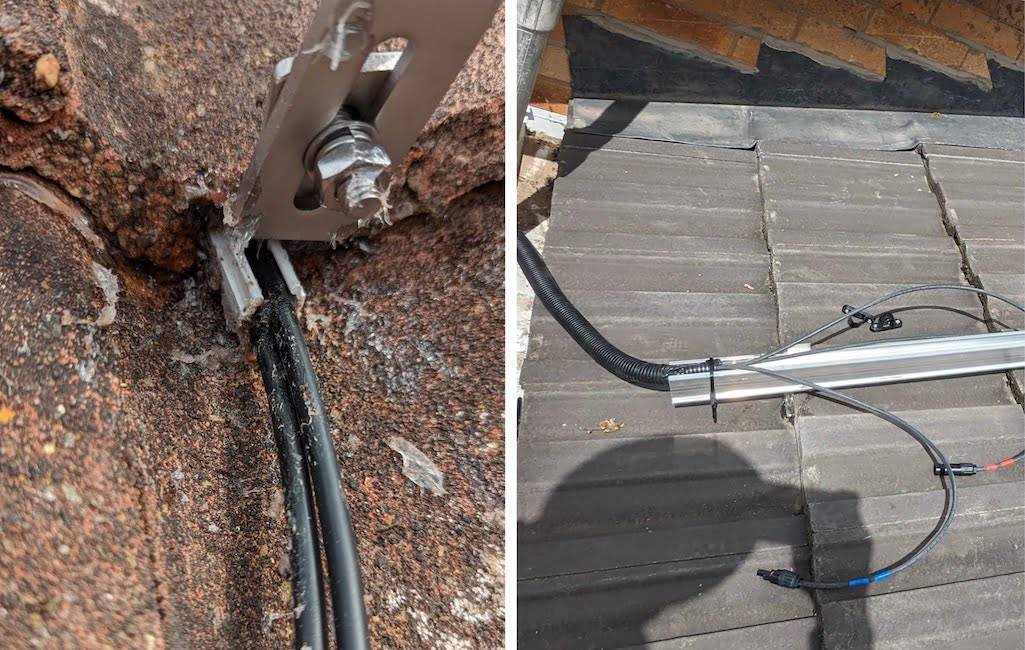
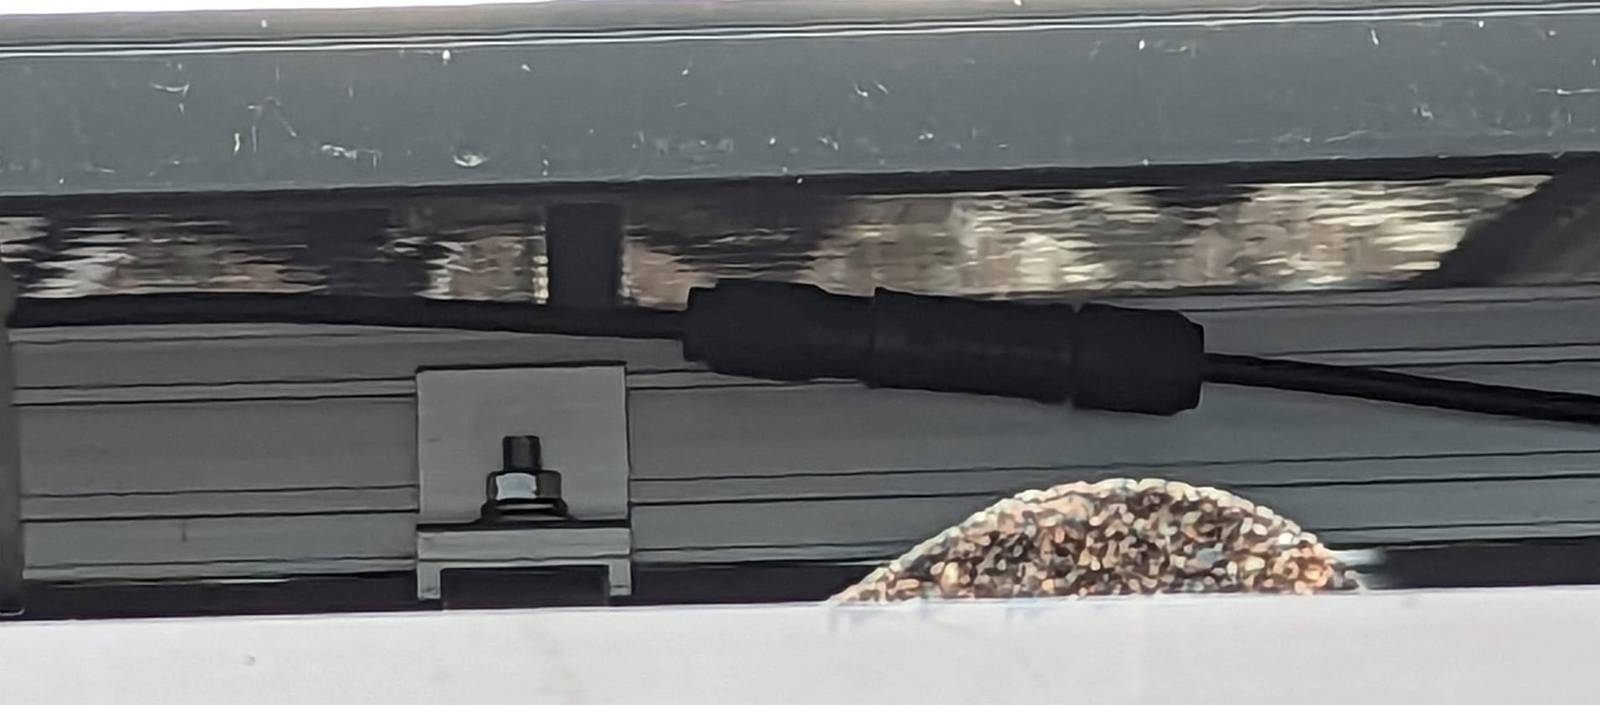
Make plenty of space for the cable and use a conduit to protect it from tile movements and wear over the years. All cables should be secured under the panels. Thus, we ensure they stay away from areas that could be damaged by weather or pests.
Use a Scaffold
You will want to use a scaffold when installing solar panels on anything taller than a garage. Solar Panels are incredibly awkward to handle, and that emphasises their weight. The uncomfortable position of working on a ladder or a roof’s ledge complicates matters further. My recommendation to DIYers is to hire a scaffolding tower.
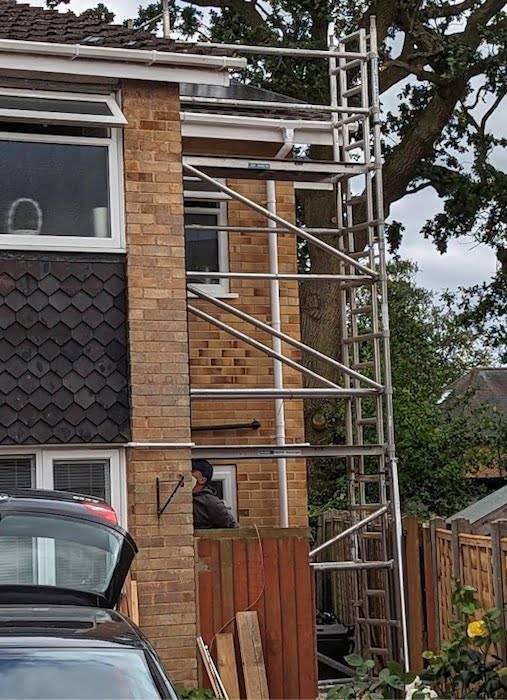
They are a simple, inexpensive way of staying safe and are relatively easy to build up and dismantle.
Mounting Equipment Summary and Practical Advice
Buying mounting equipment is not a big challenge; most of the variety is just manufacturer-specific.
Depending on your case, you may need special equipment. For example, if you are installing on metal or flat roofs, the above is not directly applicable, but the principle remains the same. Most of the variation is redundancy.

