Solar Assistant is the local monitoring and control layer I use on a Sunsynk hybrid: a Raspberry Pi, one connection path to the inverter, live readings you can prove against the display, then automation later. Deye shares much of the same platform and official Solar Assistant support, but I have not commissioned a Deye unit myself.
This page is the first-time setup front door. It covers hardware, cable and port choice, commissioning checks and failure routing. It does not teach automation recipes, forecast charging or deep CRC cable surgery. Those already have dedicated owners on SEC.
Go straight to the job you have:
- Choose hardware
- Choose the connection path
- Install and first connect
- Prove the readings
- Diagnose a failed first connection
Buy and do order if the battery already uses the RJ45
- Photograph the rating label, free ports and the battery cable already in the combined RJ45.
- Open the official Solar Assistant model page for that exact model string.
- If the combined port is occupied, plan a documented 2-in-1 or purpose-built split first. Do not buy a random Ethernet Y-splitter.
- Order only a model-matched RS485 cable or the official pinout-compatible path. Generic marketplace USB-RS485 leads usually fail.
- Then buy or free a supported Pi, power supply and Solar Assistant licence.
- Flash, connect that single path, and prove live values against the inverter before any automation.
I run this on a Sunsynk 3.6 ECCO with Fogstar batteries, Solar Assistant on a Pi, and Home Assistant over MQTT. I have not catalogued every Pi revision and cable SKU here.
Deye is well covered by Solar Assistant’s own model pages and much of the same decision order applies, but I have not set one up myself. For a Deye, use the official model page alongside this guide.
Flashing, supported boards and pinouts stay with Solar Assistant’s docs. This page is the homeowner order of operations: what to buy, which path to pick, how to prove the link, and where to go when it fails.
What Solar Assistant adds
The native Sunsynk and Deye apps are useful for basic monitoring. They are weaker when you need continuous local data, faster updates than a cloud app cycle, or automation that does not depend on a remote server staying healthy.
On my Sunsynk stack the manufacturer app often felt laggy compared with a local serial feed. I do not treat a five-minute figure as a universal cloud SLA for every brand and firmware.
Solar Assistant sits on a Raspberry Pi on your LAN. In a healthy install it can:
- read live power, SOC, voltage and related registers over a local link;
- expose charts and history without waiting on a slow cloud refresh;
- write selected settings when you enable control;
- publish MQTT for Home Assistant and other local tools;
- keep working when the manufacturer cloud is slow or offline, provided the Pi, cable and inverter still talk.
It is not free. You buy a software licence and you dedicate a Pi. Relative to a hybrid inverter and battery bank that cost is small, but it is still a real purchase and a device you must keep powered and updated.
If you only want occasional glances at production, the manufacturer app may be enough. If you want local control, tariff automation or a cloud-independent record, setup is worth doing properly once.
Hardware you need
| Item | Role | Practical note |
|---|---|---|
| Raspberry Pi or supported board | Runs Solar Assistant | Only boards on the official supported-hardware list. “Any Orange Pi” is not a safe assumption. |
| microSD card | System image | Flash the official Solar Assistant image, not a generic Raspberry Pi OS image. |
| Power supply | Keeps the Pi stable | Under-powered supplies create mysterious disconnects that look like inverter faults. |
| Ethernet or Wi-Fi | LAN access | Ethernet is more boring and more reliable near electrical noise. |
| Connection path | Talks to the inverter | Exactly one of: model-matched RS485 cable, RS232 where the model page allows it, or a documented logger path. |
| USB serial path | Often required for RS485 | The Pi does not speak RS485 natively. Use a cable or adapter with the pinout for your inverter family, not a generic Amazon RS485 lead. |
I run Solar Assistant as a dedicated monitoring box for the inverter and batteries. That separation keeps a Home Assistant crash from taking the inverter link with it, and it keeps the serial path easy to reason about.
Do not buy the cable blind
For common Sunsynk and Deye low-voltage hybrids, Solar Assistant’s RS485 pages are explicit:
- the RJ45 pinout is non-standard;
- generic USB-RS485 cables from marketplaces usually will not work unless they list your inverter or the official pinout;
- the monitoring port is often inside the inverter, so access means following the manufacturer open-cover procedure with power isolated;
- in Solar Assistant you select the platform family Deye, SunSynk, Sol-Ark, then the USB device.
Open the official model page for your exact rating-label string before you order anything. A cable that works on one Deye or Sunsynk family can still be wrong on another badge or brand.
Choose only one connection path
Solar Assistant’s model pages are explicit: choose one connection method. All supported methods can provide the same metrics and control. Running more than one at once can produce partial or corrupted reads.
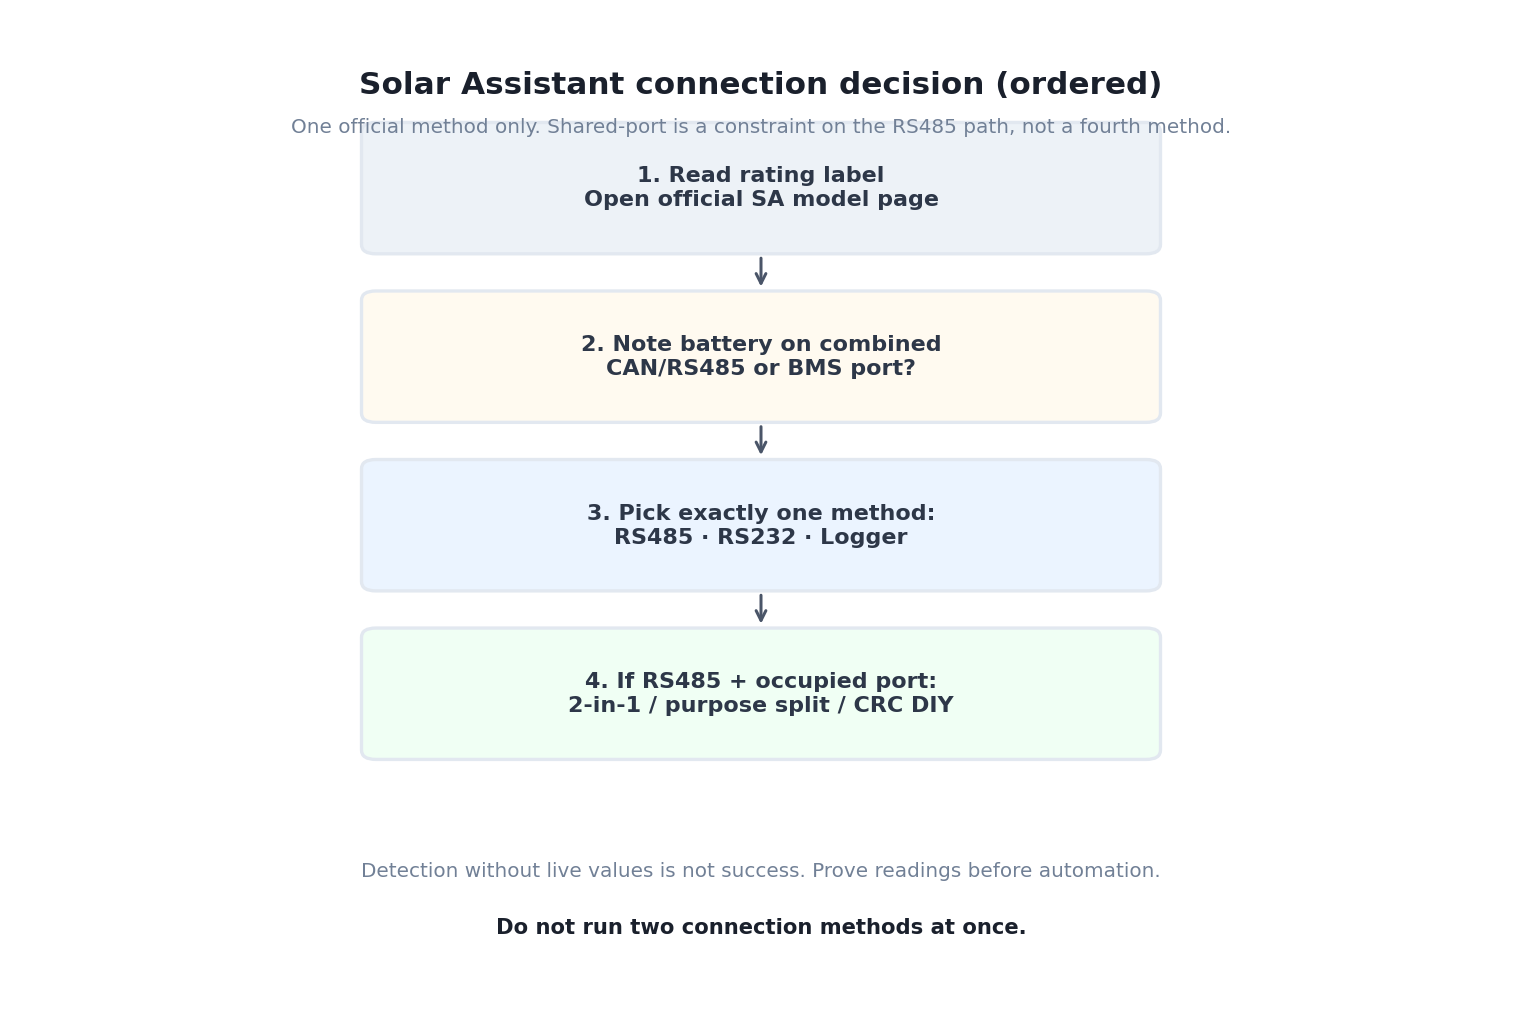
Work the decision in this order:
- Read the rating label and open the matching Solar Assistant model page.
- Note whether a battery already occupies a combined CAN/RS485 or BMS RJ45.
- Pick exactly one official method: RS485 cable, RS232 where listed, or logger/network path.
- If you chose RS485 and the combined port is occupied, plan a documented 2-in-1 or purpose-built split before you power anything.
| Official method | When it is a good first choice | What you still must prove |
|---|---|---|
| RS485 cable into the inverter | You want local control, low latency and independence from the Wi-Fi logger | Correct model-matched pinout, port, polarity, stable error-free frames |
| RS232 cable | The exact model page documents an RS232 option and you have the right lead | The documented connector and pinout for that model, not a generic serial myth |
| Solarman / Wi-Fi logger path | The dongle is already installed and the model page supports network read | The logger is online, the Pi can reach it, and the connection is actually usable for metrics and any control you need |
Detection is not success. Owners and engineers have reported cases where a logger or dongle is visible in Solar Assistant but is not a working connection path. Prove live values before you trust the install.
Shared CAN and RS485 on one RJ45
On my Sunsynk 3.6 ECCO, the battery communication cable already occupied the combined RS485/CAN port. That is the common trap: the battery needs CAN, Solar Assistant needs RS485, and a cheap RJ45 Ethernet splitter often mixes the pairs badly enough to throw CRC errors.
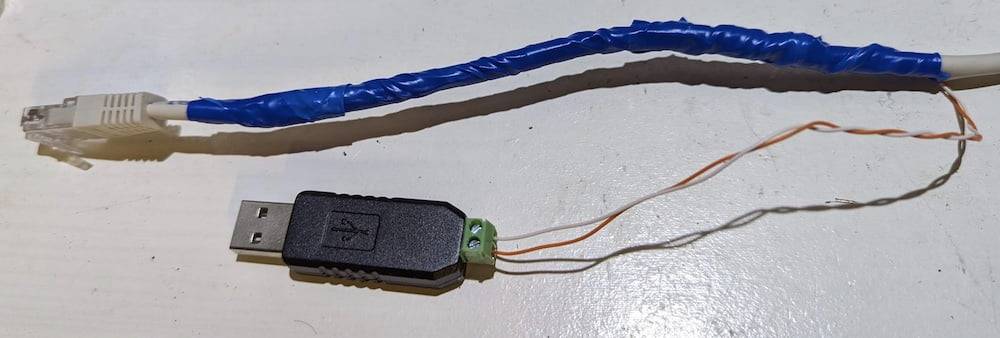
Ordered options when the battery already owns the combined port:
- Documented 2-in-1 / purpose-built splitter – Solar Assistant documents simultaneous CAN plus RS485 on some BMS ports and points to purpose-built splitters rather than random Ethernet Y-cables. Start with the official 2-in-1 BMS port guidance for your family.
- DIY pair-split cable – keep CAN pairs for the battery and RS485 pairs for the Pi. SEC’s CRC guide owns the wire-by-wire method, photographs and failure modes.
- Never a random network splitter bought as “RJ45 1 to 2” without pin proof.
Install and first connection
Use the official Solar Assistant flash process. In plain terms:
- Register and download the Solar Assistant image for your account.
- Extract the image. Flash the image file itself, not the zip archive, with Raspberry Pi Imager or an equivalent tool.
- Insert the card, power the Pi and join the temporary setup network or Ethernet path described in the docs.
- Bring the device onto your LAN and open the web UI.
- Add the inverter using the single connection method you chose. For RS485 on these hybrids, select Deye, SunSynk, Sol-Ark, then the USB serial device.
- Save, wait for the first live packets, then leave the native inverter menus alone while you validate.
I treat first connection as a measurement job, not an automation job. No rules, no MQTT consumers and no tariff experiments until the live dashboard looks sane for a full quiet minute and a loaded minute.
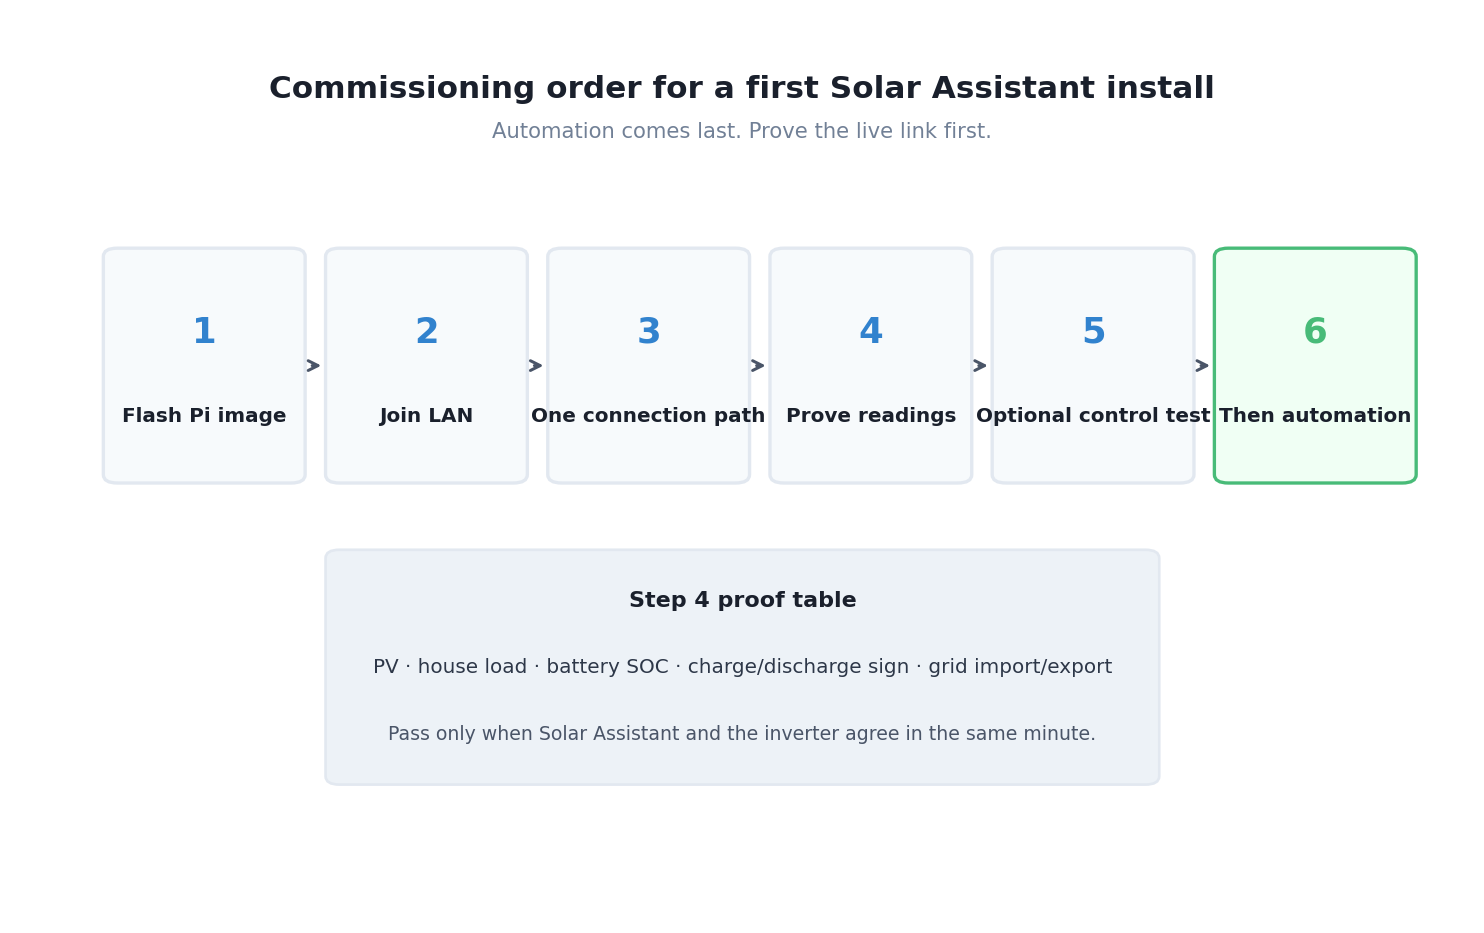
If the UI never sees a serial device, stop at the USB adapter and cable. If the serial device appears but values never move, stop at port, polarity and model selection. If the device is detected but values stay empty or frozen, treat that as a failed path, not a green light. If values move but look wrong, stop at commissioning checks before you write any setting.
Prove the readings before you trust control
A green “connected” badge is not enough. Compare Solar Assistant with the inverter’s own display or manufacturer app for the same moment.
| Check | Pass condition | Fail means |
|---|---|---|
| PV power | Tracks the inverter within normal update lag when the sun changes | Wrong device, stale logger path or mis-mapped registers |
| Load / house power | Moves when you switch a known large load | CT/meter path or mapping problem on the inverter side |
| Battery SOC | Matches the battery or inverter SOC trend, not necessarily every decimal | Protocol or battery-link issue; do not automate SOC targets yet |
| Battery power sign | Charge and discharge directions agree with the inverter | Polarity or register interpretation problem |
| Grid import/export | Agrees with the inverter and, ideally, a smart meter spot check | CT direction, trickle settings or mapping issues |
| Control write (optional) | One reversible harmless change appears on the inverter, then restore it | Do not leave experimental values in place overnight |
On my system the point of this stage is simple: if Solar Assistant and the inverter disagree about power flow, every later automation will amplify the lie.
I have not published a dated side-by-side commissioning photo set for this page yet. Until that exists, treat the table as the method, and treat my first-hand contribution as the shared-port constraint plus the rule that commissioning beats automation. Owned cable photographs live in the CRC guide.
Only after these checks pass should you enable broader setting control or MQTT consumers. Rule behaviour and crash-safe defaults belong in the automation guide, not here.
Local access, remote access and the manufacturer cloud
Keep three layers distinct:
- Inverter local link – cable or logger path into Solar Assistant.
- LAN access – browser or app to the Pi on your home network.
- Remote access – VPN or another deliberate method you control.
Solar Assistant’s value for me is local independence. The manufacturer cloud can still exist for firmware or installer support, but my day-to-day monitoring does not need it to refresh.
If you expose the Pi to the internet, treat it like any always-on control device: strong credentials, updates, and no open admin surface you do not understand. Prefer a VPN into your LAN over making the Solar Assistant UI a public website.
Cloud-independent behaviour
When the manufacturer app is slow or offline, a healthy Solar Assistant install should still show live data if:
- the Pi has power;
- the serial or logger path is intact;
- the inverter is powered and communicating;
- your phone or laptop can reach the Pi on the LAN or VPN.
If the cloud is up but Solar Assistant is blank, the fault is local. If Solar Assistant is live and the cloud is blank, your local install is doing its job.
That is the resilience argument in one sentence: local monitoring fails for local reasons, not because a remote server had a bad afternoon.
Commissioning checklist
Work through this once and keep the answers with the install photos.
- Exact inverter model string from the rating label.
- Battery model, protocol and whether it uses the combined CAN/RS485 port.
- Connection method chosen: RS485, RS232 or logger path.
- Cable type, approximate length and adapter or official cable identity.
- Pi model, power supply rating and whether Ethernet or Wi-Fi is used.
- Solar Assistant version after first update.
- Screenshot of live PV, load, battery and grid values beside the inverter display.
- Confirmation that only one connection path is enabled.
- Note of any reversible control test and the restored values.
- Decision on MQTT: off for now, or on only after the live link is trusted.
If you cannot complete items 1, 3, 7 and 8, you are not finished commissioning.
Failure-routing tree
Use this before you change inverter charge limits or rewrite automations.
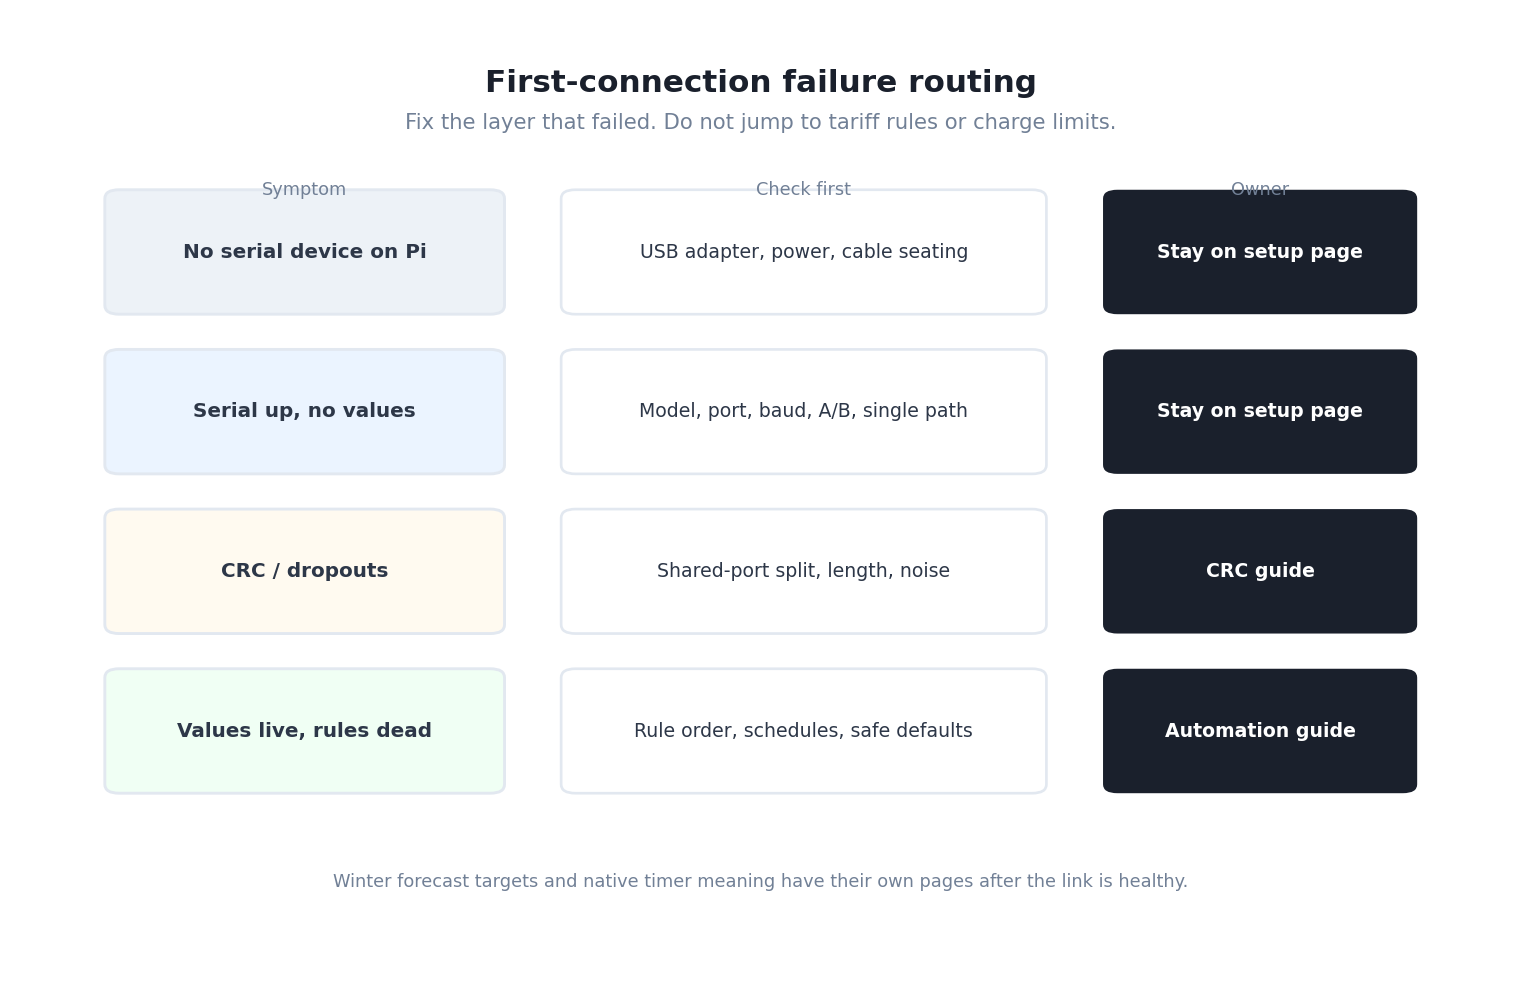
| Symptom | Check first | Then | Deep owner on SEC |
|---|---|---|---|
| No serial device on the Pi | USB adapter, cable seating, Pi power | Different USB port, known-good model-matched cable | This setup page |
| Serial or logger detected, no usable values | Model selection, port, polarity, single path | Treat “detected but empty” as a failed path | This setup page |
| CRC errors / intermittent frames | Cable length, shared-port split, interference | Do not keep buying random splitters | CRC error guide |
| Values live, rules do nothing | Rule order and schedules | Automation owner, not more cable shopping | Automation rules guide |
| Winter overnight target wrong | Forecast input and HA logic | Not a first-connection fault | Winter forecast charging |
| Need native timer behaviour explained | Operating mode and timer SOC interaction | Model-scoped settings, not Pi wiring | Sunsynk and Deye settings guide |
The important discipline is routing. A CRC fault will not be fixed by a clever tariff rule. A wrong overnight SOC target will not be fixed by re-crimping the cable.
What this page deliberately does not own
- Official step-by-step flashing screenshots and every supported board revision belong to Solar Assistant’s own docs, including supported hardware.
- Wire-level CAN/RS485 surgery and splitter failure modes belong to the CRC guide.
- Export-forcing rules, discharge caps and crash-safe amp floors belong to the automation rules guide.
- Forecast-led winter targets belong to the winter charging guide.
- Badge-level Sunsynk versus Deye capability differences belong to the capabilities comparison.
Those links are how topical authority works in practice: one clear owner per decision, with this page as the front door for “how do I get Solar Assistant talking to my inverter?”
Security and safe-access boundary
A homeowner can normally:
- flash the Pi image and join it to the LAN;
- connect a documented cable or logger path;
- compare live readings with the inverter;
- enable MQTT on a private network they control;
- install updates when the install is healthy.
Keep these outside casual experiment:
- opening an inverter cover or dressing internal ports on a live unit (isolate AC and DC per the manufacturer procedure, or use a competent person);
- energised AC and DC terminals while dressing cables;
- undocumented installer menus on the inverter;
- exposing the Solar Assistant UI directly to the public internet;
- leaving test control writes active overnight;
- changing battery protocol settings to “make RS485 work”.
If the inverter is under an installer warranty relationship, record what you connected and when. Local monitoring is common DIY practice on these platforms, but your contract language is still yours to check.
Sources and evidence context
Primary operational references checked while preparing this guide:
- Solar Assistant, Load Solar Assistant on Raspberry Pi (image download, flash and first boot).
- Solar Assistant, Supported hardware.
- Solar Assistant, Sunsynk SG01LP1 family connection options and RS485 pinout and cable warning.
- Solar Assistant, 2-in-1 BMS port.
- Solar Assistant, model index under Sunsynk help and Deye help.
- SEC first-hand pages: CRC shared-port repair, Solar Assistant automation rules, winter forecast charging and the Sunsynk 3.6 ECCO owner review.
My first-hand contribution is the live Sunsynk 3.6 ECCO, Fogstar and Solar Assistant arrangement, including the shared-port constraint and the rule that commissioning beats automation. It is not a controlled multi-model cable survey and it is not a Deye bench test. Public X posts from identifiable engineers were useful as problem signals (logger detected but unusable, non-universal cables, supported-board limits) and were not used as how-to authority.
The next move
Photograph the inverter rating label, the current battery communication cable and the free ports. Choose one connection method from the official model page. If the combined port is occupied, plan a documented 2-in-1 or the CRC split before you buy a second mystery cable. Flash the Pi, connect that single path, and run the prove-readings table before you enable control or MQTT.
When the live values agree with the inverter, you have a Solar Assistant install. Everything else on SEC, from tariff rules to winter forecasts, builds on that foundation.
